Click on Settings and choose Messaging from the left tab and then you can choose Response Assistant from the main area.
Response Assistant
The Response Assistant has four main sections, each containing at least one customization option. Let’s go through them now.
1. Send Instant Replies to Anyone Who Messages Your Page
There’s nothing worse than silence when you reach out to a company with a question or request. Whether you are online or off, an instant reply is a great way to assure your customers that you are aware of their message and will respond to them as soon as you can.
When this option is enabled, visitors are automatically sent a reply from the Response Assistant (on behalf of your business page). You can customize the reply by editing or replacing the default reply, which you can see above.
Add Personalization
Personalization today is extremely important to online users. The more you can personalize someone’s experience the better.
To add personalization to your automated messages, click the “Add Personalization” button under the custom message section.
Choose the information you would like automatically updated from the pop-up. At the very least, working someone’s first name into a message (even if it’s automated) is a great way to enhance your visitor’s experience.
You can also add things like your website URL or company’s phone number to encourage users to call you if they need immediate assistance.
In the example above, you can see the added personalized information outlined and in blue. If the user messaging you is named Lisa, that is the name that will populate in your automated reply. If the user’s name is Phil, that is the name that will appear.
All personalized information about your company that you include, such as domain, phone number, address, etc., will remain consistent with the company information you have on your business page.
2. Stay Responsive When You Can’t Get to Your Computer or Phone
Just because you’re away from your computer or phone, that doesn’t mean you can’t connect with your customers in real time. This option allows you to assure your customers that despite being away, you will respond once you return.

Just like the first example, you can customize the message your customer receives by editing or replacing the default away message.
Customize Your Schedule
If you know when you will and won’t be available to respond to customers live, set your schedule and let the Response Assistant take over when you’re away.
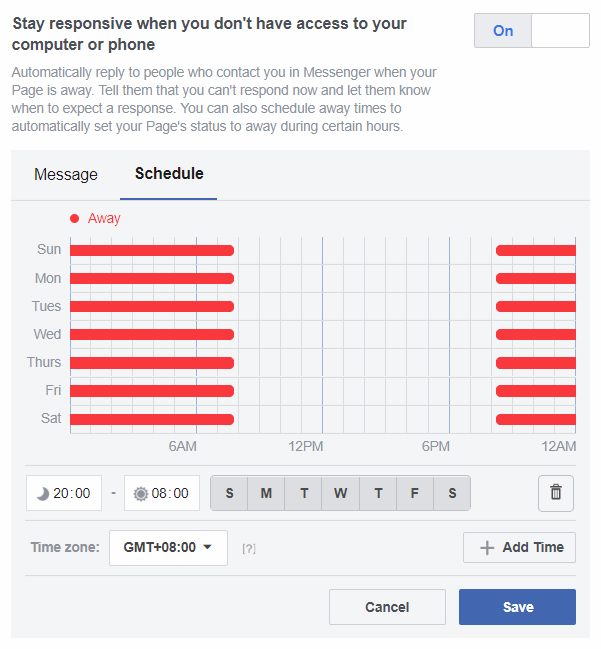
Set your schedule by saving regular days and times for your availability. This will let your Response Assistant know how to reply to new messages at the appropriate times.
Customize Your Timezone
Make sure you set your timezone using the drop-down provided so your schedule is accurate to your location.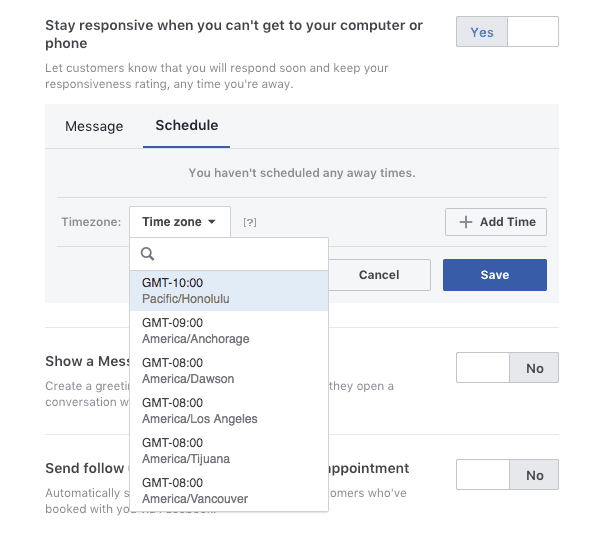
3. Show a Messenger Greeting
This greeting will show up when someone starts a conversation with you on Messenger for the first time.
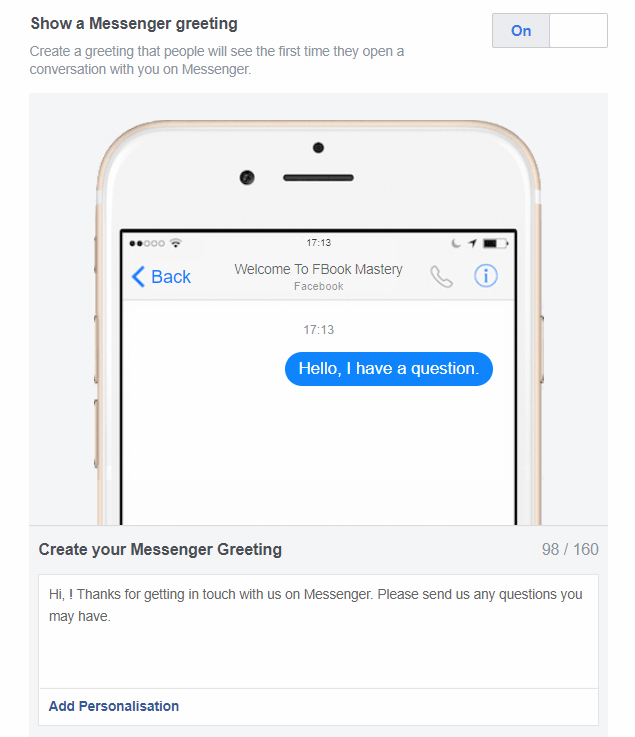
You can customize this message by editing or replacing the default message. This option also allows for personalization.
This message will disappear after a few moments or when the user starts messaging you, whichever comes first.
4. Send Follow Ups to Anyone Who Books an Appointment
If booking appointments apply to your business, you can send follow-ups to anyone who books an appointment with you to encourage ongoing business.
That's all there is to it. It's really easy and a powerful way to ensure your users get their initial queries answered instead of wondering "if there's anyone home" on your Page.
Make sure you start utilising this great facility for your Business Page today!